Attic and Loft Painting in Vancouver
Posted on August 20, 2026 by The Vancouver Painters Team
Quick answer: An attic or loft can usually be repainted when knee-wall fields, sloped ceilings, trim, doors, and painted hatch or stair returns are sound and dry. Resolve roof stains, soft drywall, failed caulk, and heat or condensation marks before coating. Stage furniture through the hatch, keep insulation and mechanical access clear, choose a washable low-odour system that can handle temperature swings, and allow enough drying and cure time before storage, hangers, and daily loft use return against finished surfaces.
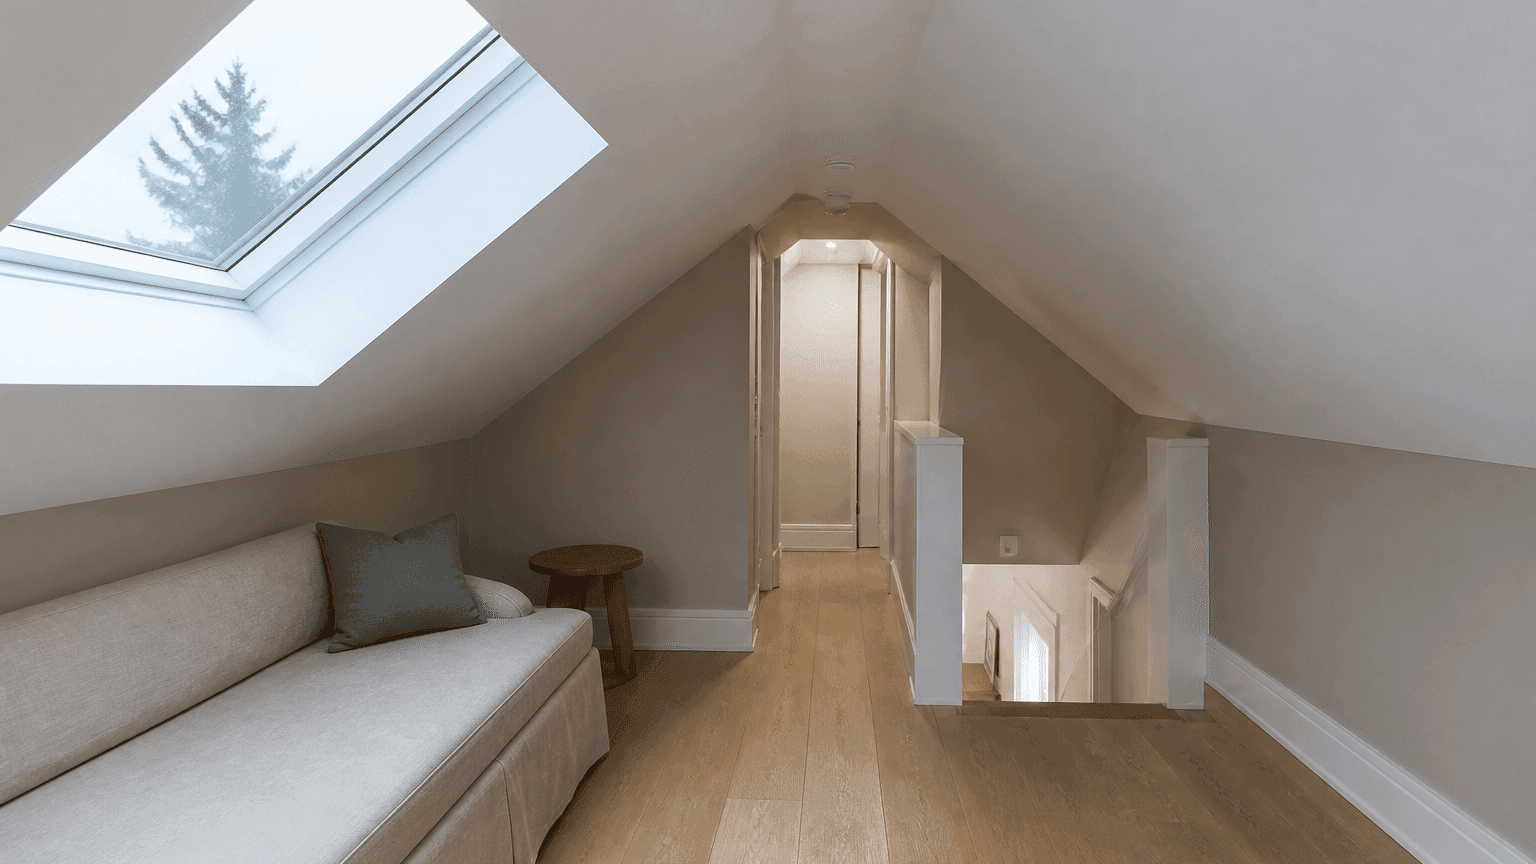
Attics and finished lofts in Vancouver sit between a quiet upper room and the roof assembly. They often hold short knee walls, sloped ceilings around a skylight, and a compact hatch or stair that opens to a hallway or bedroom the household sees first. A useful estimate should identify every included surface, hatch staging, insulation access, adjoining sightlines, and return-to-use cure timing rather than simply say “paint the attic.”
This guide covers attic and loft knee-wall fields, sloped ceilings, trim, doors, painted hatch or stair returns, skylight wells that stay in the coating package, and hallway or bedroom planes that belong to the same visual scheme. A dedicated playroom and bonus room guide remains the companion when a rectangular over-garage activity room dominates. A basement painting guide remains the companion for below-grade moisture, concrete, and cooler-room work rather than heat, hatch, and roof-adjacent scoping.
Name each attic and loft surface before pricing
Homeowners often assume “attic painting” means the open wall fields only, or that knee walls, sloped ceilings, hatch frames, and the bedroom return are automatically included. A component list makes quotes easier to compare:
- Knee-wall fields: Short vertical drywall walls under the roof slope, outside corners, previously patched storage or furniture zones, and returns beside the hatch or stair
- Sloped ceilings: Painted roof-slope planes, collar-tie or bulkhead faces, and the area around a skylight well if those planes stay finished
- Ceilings and high walls: Flat or low-slope surfaces around lights, detectors, and any remaining attic hatch inside a finished loft
- Trim: Baseboards where present, door casings, skylight casings, and painted hatch or stair trim
- Doors: Loft door slab, edges, and frame, plus closet or storage doors opening off the room
- Hatch and stair returns: Painted hatch lid, frame, pull-down stair stringers if coated, and the first hallway or bedroom wall seen from the opening
- Adjoining returns: Open hallway or bedroom walls that share the same colour scheme
Specify whether the scope includes sloped ceilings, knee-wall interiors behind storage, hatch lids, unfinished rafters, insulation access panels, and every painted return into the hallway or bedroom. A full interior painting project may include some of these surfaces, but attic and loft details should still be listed separately.
Inspect for roof stains, heat marks, and coating failure before preparation
Paint should not conceal unresolved substrate, roof, or ventilation failure. Check the room with the skylight uncovered, storage pulled clear of the knee walls, and both fixture light and Vancouver’s cool daylight on the slopes before cleaning or sanding removes clues.
Look for:
- Soft, swollen, or crumbling drywall at knee walls, skylight wells, or roof penetrations
- Peeling, bubbling, or blistering paint on sloped ceilings after summer heat or winter condensation
- Brown or yellow stains that may point to roof, flashing, or plumbing issues
- Recurring latch-height marks at the hatch, stair nosing scuffs, and furniture rubs along short knee walls
- Nail pops, hairline cracks, and joint movement after seasonal humidity and heat swings
- Failed caulk or open joints at skylight casings, hatch frames, and baseboards
- Insulation dust, exposed vapour-barrier edges, or blocked soffit or ridge ventilation nearby
- An older or unknown coating that may need hazardous-material assessment before disturbance
A painter can document visible coating and surface conditions but should not certify roofing, insulation, or attic ventilation. Soft drywall, active leaks, and persistent staining need assessment and repair by the appropriate qualified trades before coating. Older coatings deserve caution before sanding or scraping — ask about testing or safe-work methods when the coating age is unknown.
Review hatch staging, insulation access, and adjoining rooms before choosing a system
Attics fail schedules for reasons that differ from basements or bonus rooms. Hatch or stair access, heat on sloped ceilings, insulation and mechanical access, and hallway or bedroom sightlines matter as much as colour preference.
Clarify before production:
- Whether furniture and storage can leave through the hatch or stair, or the work must finish around remaining pieces
- Whether open hallway or bedroom returns should match colour and sheen in the same phase
- Whether knee-wall access panels, insulation stops, hatch lids, and sloped-ceiling planes stay in scope or are masked only
- Whether the same space also functions as a playroom or bonus room or a sleeping bedroom and needs toy staging or overnight-sleep planning in the same phase
- Whether the loft is heated regularly or sits much hotter or cooler than the rooms below
If coatings fail at the same sloped-ceiling bands or knee-wall returns, plan better washable systems, heat and condensation controls, and access timing before relying on a new topcoat alone. Product selection for humid openings near a hallway is covered in our moisture-resistant interior paint guide. A dedicated basement guide remains the companion for below-grade moisture; attic and loft work needs its own knee-wall, hatch, insulation-access, and hallway or bedroom sightline matching.
Decide what belongs in the painting scope
Attic and loft work often sits next to bedroom, hallway, closet, bonus-room, or roof-adjacent tasks. Clarify boundaries early:
- Refresh sound painted surfaces: Clean, dull, prime where needed, and recoat finished knee walls, sloped ceilings, and trim.
- Repair and then paint: Patch furniture scuffs, nail pops, hairline cracks, and limited drywall damage after any leak source is resolved.
- Include hatch and stair returns carefully: Confirm whether hatch lids, frames, pull-down stair parts, door slabs, edges, and frames are coated or left masked.
- Exclude unfinished or specialty surfaces: Mask exposed insulation, vapour barrier, unfinished roof decking, mechanical equipment, and factory-finished skylight frames unless those items are separately quoted.
- Coordinate adjoining returns: Plan hallway and bedroom returns as one visual scheme rather than leaving mismatched leftover paint around the hatch.
- Keep bonus-room and basement work separate when needed: If the same upper floor is also a playroom or bonus room, or if the household is comparing this space with a basement, treat toy staging or below-grade moisture with those checklists rather than assuming an attic refresh is enough.
If walls need more than minor patching, review our guide to drywall repair before painting in Vancouver. Soft or repeatedly stained board after a roof leak is a repair or replacement issue, not a thicker paint problem.
Preparation determines whether the finish will last
Attics collect insulation dust on closed-hatch walls, heat-softened films on sloped ceilings, hand oils on hatch hardware, and fibre from storage shoved against knee walls. Painting over that contamination can cause poor adhesion or a streaky finish when cool Vancouver daylight hits a freshly coated slope beside a skylight and hallway return.
A condition-specific preparation sequence may include:
- Clear furniture, décor, and overflow storage away from coating and cure zones, using the hatch or stair as the only path
- Keep insulation, vapour-barrier, and mechanical access panels closed or protected so they stay usable after the job
- Confirm surfaces are dry enough for the specified system after any recent leak, wash, or hot-weather cycle
- Degrease and clean knee walls, sloped ceilings, trim, doors, and hatch returns with a method suited to insulation dust and hand oils
- Scrape or sand loose coating and feather sound edges
- Dull glossy retained finishes without damaging adjacent flooring, hatch hardware, or skylight frames
- Fill appropriate nail holes, knee-wall chips, and open finish joints
- Spot-prime stains, repairs, and adhesion-risk areas
- Caulk appropriate trim and finish joints after the substrate is ready
- Final dust removal before primer or finish coats — rooms under a roof need a second pass after sanding because settled insulation dust shows immediately on fresh slopes and knee walls
Do not assume a furnished loft can be painted with only a few inches of clearance around a daybed under a slope. Surfaces and the air path need to be dry according to the product requirements and site conditions.
Protect flooring, hatch access, and loft use carefully
Attic painting is as much about hatch staging and insulation access as it is about the walls. Protection and temporary upper-floor plans should be written before production starts.
Plan for:
- Floor coverings suited to hardwood, laminate, or carpet on a compact loft floor
- Furniture and storage staged below or away so fresh paint is not leaned against during early cure
- Hatch hardware, stair treads, skylight frames, and detectors kept clear and protected
- Light switches, outlets, and thermostat walls masked carefully
- Temporary routing so the household is not forced through a wet hatch or against a curing knee wall
- Pet and household traffic controls during coating and early cure, especially at the opening into a hallway or bedroom
Whether hatch lids, knee-wall access panels, and door edges are painted in place or sequenced separately should be written into the estimate. Over-spray and roller spray show quickly on insulation, stored textiles, and hallway flooring outside the hatch. If the loft shares air with a hallway or bedroom, the estimate should say how odour and access will be managed while coatings dry.
Choose colour, sheen, and products for heat, slopes, and cleaning
Attics need finishes that look calm under a skylight, survive summer heat on sloped ceilings, wipe after hatch-height marks, and keep odour manageable before daily loft use returns. Product and sheen choices should reflect cleaning needs, temperature swings, knee-wall contact, and how soon storage is reloaded.
Common planning points:
- Soft mid-value neutrals often keep a low-ceiling loft from feeling closed-in better than a high-contrast accent on every slope
- Washable wall systems suit knee-wall bands, hatch returns, and furniture-contact corners
- Ceiling systems should show fewer roller marks on sloped planes and around skylight wells
- Door, trim, and hatch-frame finishes usually need a harder-wearing enamel-style system than field walls
- Low-odour or low-VOC paint options help when a bedroom below shares air through the hatch
- Sheen should balance cleanability and wall-flaw visibility; review our paint sheen guide
Do not assume leftover bedroom or hallway paint is automatically right for every attic surface. Heat on slopes, insulation dust, and a hallway sightline can change the system. Ceiling work is covered in our ceiling painting guide, and trim or door scope often follows the same sequencing as painting trim and doors. Closet interiors that stay in scope often follow the same boundaries as closet painting.
Plan ventilation, recoat time, and return to loft use
Vancouver attics can run hot under a dark roof in summer and stay cool and still after coating when the hatch stays closed, especially in older homes with limited cross-ventilation. Recoat and cure windows should be written for the actual temperature, humidity, and airflow on site.
Ask the contractor to document:
- How the space will be ventilated during and after coating without blocking soffit or ridge ventilation
- Whether furniture, storage, and bedding must stay out, and for how long
- Recoat timing for knee walls, sloped ceilings, trim, doors, and hatch returns
- When hangers, shelves, furniture, and daily loft use can return against finished surfaces
- When the hatch can close and latch regularly without softening the finish
- Any odour expectations for rooms that share air with hallway or bedroom areas
Light household passage can come sooner than reloading storage against a knee wall or sleeping under a fresh sloped ceiling. Plan more drying time rather than less if the loft is hot, sealed, or poorly ventilated, and keep the space ventilated as specified before daily use returns.
What affects attic and loft painting cost in Vancouver
Attic pricing usually turns on hatch staging, knee-wall and sloped-ceiling complexity, hallway and bedroom matching, colour changes, and return-to-use cure timing more than square footage alone. Factors that commonly change an estimate include:
- Total knee-wall, sloped-ceiling, trim, door, hatch, and skylight-well area in a compact footprint
- Drywall repair or stain blocking required before coating
- Whether furniture and storage must be moved through a hatch, wrapped in place, or staged room by room
- Hatch and stair complexity—standard hinged lid, pull-down stair, or a finished open stair
- Occupied-home protection and upper-floor access timing before daily use returns
- Product system for washable durability, stain blocking, heat-prone slopes, or low odour
- Number of colour changes and hallway or bedroom return matching
- Ventilation and extended cure planning before storage and daily loft use return
Use our interior painting cost guide for Vancouver for broader pricing context, then compare line items rather than headline totals. If the same upper floor also hosts playroom or bonus-room activity or a sleeping bedroom, price hatch staging and overnight-sleep walls clearly rather than folding them into a wall-only number.
Common attic and loft painting mistakes
- Painting over insulation dust, roof stains, unresolved leaks, or soft drywall
- Skipping thorough cleaning of closed-hatch walls, sloped ceilings, and knee-wall bands
- Leaving furniture and storage poorly protected on a compact loft floor
- Treating hatch lids, knee-wall access panels, and door edges as the same job as a simple wall-only recoat
- Coating insulation, vapour barrier, or ventilation openings that must stay accessible
- Using a glossy, high-glare paint that flashes every slope joint under a skylight
- Using a flat, hard-to-clean wall paint in hatch-return and knee-wall contact zones
- Underestimating hot-slope or closed-hatch dry and cure times before use returns
- Ignoring hallway and bedroom sightlines from the hatch or stair
- Matching quotes by price alone without matching surface lists and insulation exclusions
Questions to ask when comparing estimates
Ask each contractor:
- Which knee walls, sloped ceilings, trim, doors, hatch returns, and skylight wells are included?
- Which hallway, bedroom, closet-interior, bonus-room, and unfinished-attic surfaces are excluded?
- Are hatch lids, insulation access panels, and door edges excluded, masked only, or quoted separately?
- What roof stains, soft drywall, heat marks, or moisture issues were identified?
- Which defects need drywall, roofing, insulation, or other specialist work first?
- How will dirt, loose paint, gloss, insulation dust, and hand oils be addressed before coating?
- Is stain-blocking primer, bonding primer, washable wall paint, or a low-odour system part of the plan?
- How will floors, hatch hardware, insulation, and detectors be protected?
- How will the household keep using the hallway or bedroom below while the loft is offline?
- Which products, colours, sheens, and coat sequence are proposed?
- What ventilation, recoat, cure, and return-to-use instructions apply?
- How will cleanup, touch-ups, final inspection, and workmanship warranty be documented?
Use our house painting quote comparison guide to check insurance, payment terms, change orders, cleanup, exclusions, and warranty language alongside these attic-specific questions.
Attic and loft painting FAQs
Can you paint an attic or loft while living in the home?
Yes, if staging, hatch routing, and cure timing are clear. Many Vancouver projects paint the loft in one phase and keep the connecting hallway or bedroom usable for limited access while coatings dry. The estimate should state how long furniture stays out and when daily loft use can return against finished walls.
Should attic walls be matte, eggshell, or satin?
All three can work when the product is intended for washable interiors. A quality washable matte or eggshell can look calmer on sloped ceilings and hide more wall imperfections under a skylight, while satin may wipe more easily after hatch and knee-wall marks in some systems. Avoid a high-gloss field that flashes every joint on a slope. Surface condition and the product data matter more than a universal sheen rule.
Is attic or loft painting different from basement or bonus-room painting?
Yes. Basement work emphasizes below-grade moisture, concrete, and cooler-room cure planning. Bonus-room work emphasizes toy-cubby staging, play-height prep, and over-garage humidity. Attic and loft work emphasizes knee-wall and sloped-ceiling scoping, hatch staging, insulation access, hallway and bedroom sightlines, and cure planning before heat-prone slopes and daily loft use return. Keep those expectations written into the estimate rather than assuming one quote covers every leftover room.
Do hatch frames, trim, and door edges need a different paint?
Often yes. Hatch lids, stair trim, door slabs, and painted knee-wall returns take more abrasion from access, storage, and daily wiping than open wall fields. The estimate should state whether those surfaces use the same wall system or a harder-wearing enamel-style finish, and whether hatch lids and insulation access panels are included at all.
How long before furniture and storage can return after painting?
Follow the current product data and the contractor's written instructions. Light household passage can come sooner than reloading storage against a knee wall or sleeping under a fresh sloped ceiling. In a hot, poorly ventilated, or usually closed attic, plan more cure time rather than less, and keep the space ventilated as specified before daily loft use returns.
Get an attic or loft painting estimate in Vancouver
Photograph the full loft with the skylight uncovered and knee walls visible, close views of the hatch or stair, any stained or soft drywall, and adjoining hallway or bedroom sightlines. Note whether daily loft use or overnight sleep returns soon and whether hallway, bedroom, closet, or bonus-room work is planned in the same phase.
Start a free, no-obligation interior painting estimate or call +1 (604) 260-1613 for 24/7 estimate requests. We help homeowners in Vancouver and across the Lower Mainland connect with a painting partner for a clearly defined attic or loft painting scope.