Exterior Window Trim Painting in Vancouver: Prep & Moisture
Posted on July 21, 2026 by The Vancouver Painters Team
Quick answer: Sound, paintable exterior window trim can often be refreshed without replacing the window or repainting the entire house. First identify which parts are trim and which belong to the operating window assembly. Peeling paint, open joints, soft wood, failed glazing compound, fogged glass, staining, and blocked weep holes do not all have the same solution. A reliable estimate should separate painting from window, glazing, carpentry, and building-envelope repairs; specify the preparation for each material; and explain how glass, drainage paths, weatherstripping, hardware, siding, and nearby property will be protected.
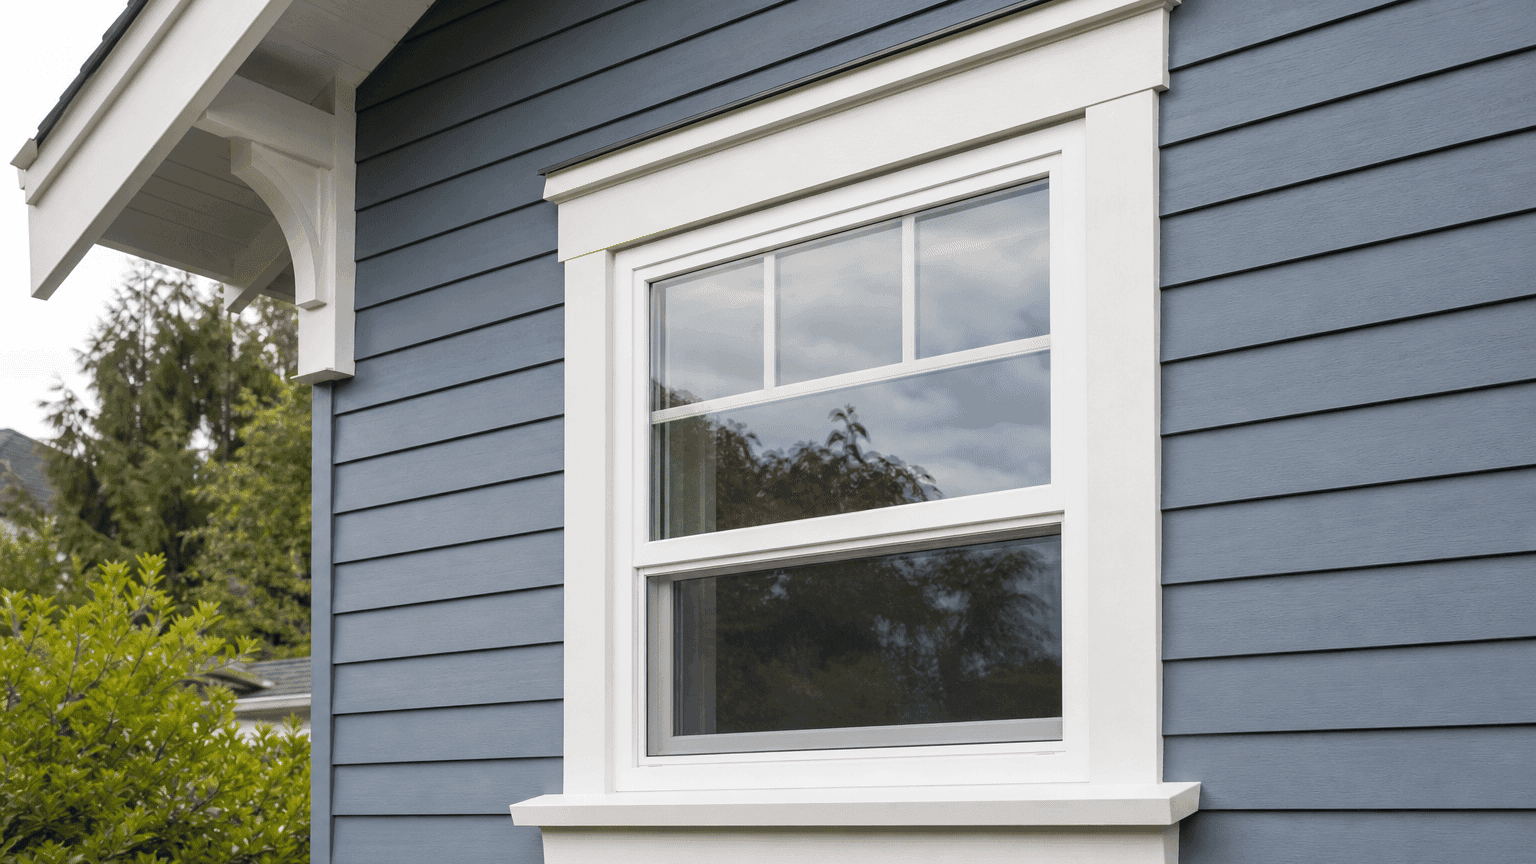
Exterior windows combine several materials in a small area. A wood casing may surround a vinyl, aluminum, fibreglass, wood, or composite window. The sill may be painted wood, metal flashing, masonry, or part of the manufactured unit. What looks like one white border from the sidewalk may therefore contain paintable trim, a factory finish, flexible sealant, glass, drainage openings, and moving parts.
This guide covers coating sound, paintable surfaces. Active water entry, rotten or structurally damaged components, failed insulated-glass units, window operation, flashing defects, and hazardous-material work need the appropriate qualified professional before painting proceeds.
Know which window parts are in the quote
Window terminology matters because two estimates can both say “paint the windows” while including different surfaces. Ask the estimator to point out every included component.
- Casing or exterior trim: Boards or mouldings that finish the opening where the window meets the wall.
- Head trim: The horizontal trim above the window. It may sit below separate metal flashing or a drip cap.
- Side trim: The vertical casing at each side of the opening.
- Sill or sub-sill: The lower exterior projection that helps shed water. Depending on the window, it may be wood trim, metal, masonry, or part of the manufactured frame. A stool is an interior trim component and is not part of this exterior scope.
- Apron: A trim board below some projecting sills.
- Frame: The fixed manufactured structure around the sash or glass. It may have a factory-applied finish that is not part of the painting scope.
- Sash: The portion that holds the glass and may open, slide, tilt, or remain fixed.
- Glazing bead or stop: A component that secures or finishes the edge of the glass.
- Glazing compound: A putty-like material used around glass in some traditional wood windows.
- Flashing or drip cap: A water-management component above or around the opening. Its material, laps, and drainage function must be respected.
- Sealant: Flexible material at selected joints. Not every visible seam is intended to be sealed.
- Weatherstripping, tracks, balances, hinges, locks, and operators: Functional parts that generally must remain clean and able to move.
- Weep holes or drainage slots: Openings designed to let water leave parts of the window assembly.
The quote should state whether it includes only the surrounding casing or also approved frame and sash surfaces, sills, aprons, decorative mouldings, storm windows, shutters, or trim returns. For a wider repaint, window details can be part of an exterior painting scope, but they should still be itemized.
Confirm what is intended for paint
Do not assume that every faded-looking window surface should receive the same coating. The surrounding trim may be site-painted wood while the frame is vinyl or factory-coated aluminum. Another opening may use wood windows with previously painted sashes and traditional glazing. Product records, labels, drawings, and current manufacturer instructions are more reliable than colour alone.
Before specifying paint, identify:
- The casing, sill, apron, sash, frame, flashing, and decorative materials
- Which surfaces were site painted and which carry a factory finish
- Whether any factory warranty or technical instruction limits field painting
- Which joints, gaps, tracks, seals, and drainage paths must remain open
- Whether the window must operate during and after the work
- Whether screens, storm panels, shutters, or hardware need separate handling
Some factory-finished frames may be suitable for a manufacturer-approved recoat system; others may have restrictions related to adhesion, colour, heat, warranty, or maintenance. Do not apply a generic exterior paint simply because the frame and trim are currently the same colour.
The same caution applies to metal flashing. A painter should not bridge laps, fill drainage gaps, or cover a finish without confirming that the material can be coated and will continue to perform its water-shedding role.
Inspect the opening before pricing the repaint
Begin from the ground in daylight. Zoomed photographs can flag areas that need a safe close inspection, but they cannot confirm concealed conditions. Do not lean out of an upper-storey window or use unsuitable ladders to investigate.
Look for:
- Peeling, cracking, blistering, chalking, fading, or uneven previous touch-ups
- Exposed wood, grey fibres, open end grain, split boards, soft lower corners, or loose trim
- Rust, pitting, oxidation, or coating failure on metal components
- Swollen manufactured trim, delamination, lifted veneers, or failed joints
- Cracked, loose, missing, or heavily overpainted glazing compound
- Failed perimeter sealant, but also deliberate gaps that may provide drainage
- Brown, grey, green, or black staining and whether it returns after cleaning
- Water trails below head trim, sill corners, flashing, or cladding joints
- Condensation between glass panes, cracked glass, or moisture inside the unit
- Windows that bind, rub, will not lock, or show uneven clearances
- Painted-over weatherstripping, tracks, hardware, labels, or drainage openings
- Caulk or paint blocking visible weep holes
- Interior staining, soft drywall, recurring condensation, or musty odour reported by the owner
Staining does not identify one cause by itself. It may reflect rain entry, condensation, gutter runoff, failed sealant, old glazing, metal runoff, mildew, dirt, or a repaired historic problem. Likewise, peeling may result from moisture, weathering, poor previous preparation, incompatible coatings, or several factors together. Our guide to bubbling and peeling exterior paint explains why the cause matters before recoating.
An estimate should record the visible condition and any investigation or repair needed before painting. If a sill is soft, glass is loose, a frame is distorted, or interior staining may be active, coating the exterior first can hide evidence without correcting the problem.
Separate painting from window and envelope repairs
Paint protects and finishes a stable, paintable surface. It does not rebuild rotten wood, restore a failed sealed-glass unit, straighten a frame, correct faulty flashing, or stop water entering through an unresolved building-envelope defect.
Before the painting start date, decide who is responsible for:
- Active leaks, flashing defects, cladding transitions, or concealed water entry
- Rotten casing, sills, framing, or structural components
- Cracked glass, failed insulated-glass seals, loose glazing, or deteriorated glazing compound
- Window alignment, locks, operators, balances, hinges, tracks, and weatherstripping
- Failed manufactured components or replacement parts
- Electrical, alarm, blind, awning, or security equipment that interferes with access
- A hazardous coating assessment where the age or history of paint makes disturbance a concern
The work may require coordination. A window professional might repair glazing or operation, a carpenter might replace deteriorated trim, and an envelope professional might address flashing or water entry before the painter prepares the repaired surfaces. The quote should name each responsibility rather than using paint as a catch-all repair.
When older paint may contain hazardous material, scraping, sanding, heat, pressure washing, and mechanical preparation need an appropriate assessment and controlled work method before disturbance. A visual guess is not a substitute for that process.
Prepare each paintable material for its coating
Preparation should respond to the actual material, previous finish, exposure, and selected system. A typical sequence for sound, paintable window trim may include:
- Confirming the included surfaces and marking all parts excluded from coating
- Protecting glass, siding, masonry, roofing, interiors, landscaping, and nearby property
- Removing cobwebs, dirt, mildew residue, chalk, grease, and other contamination with a controlled method
- Allowing joints, end grain, sill undersides, shaded faces, and absorbent materials to dry adequately
- Removing loose and unstable coating without damaging glass, seals, flashing, or sound substrate
- Feathering sound paint edges or dulling glossy areas where the specified system requires it
- Completing agreed carpentry or glazing work and preparing the repaired material
- Treating localized corrosion or stains with a compatible system where required
- Spot priming exposed or repaired areas, or using broader primer where the material and specification call for it
- Renewing only the paintable joints included in the agreed sealant scope
- Applying the selected finish within its temperature, humidity, film-build, and recoat requirements
High pressure is not automatically better cleaning. A poor spray angle can drive water behind trim, through failed glazing, into tracks, or around a vulnerable opening. It can also damage soft wood fibres, old coatings, sealant, screens, and neighbouring finishes. Our guide to pressure washing before exterior painting explains how cleaning pressure, direction, protection, and drying should fit the surface.
Primer is also condition-specific. Bare wood, resinous areas, repaired trim, exposed metal, difficult stains, and sound factory finishes may require different preparation and products. Current technical data for the selected coating should govern the system after the materials and conditions are identified.
Protect glass, drainage, and operating clearances
Careful masking is not only cosmetic. It helps keep coating away from parts the window needs in order to drain, seal, and move.
The work plan should protect:
- Glass and glazing edges not included in the coating detail
- Flexible weatherstripping, gaskets, sweeps, and compression seals
- Tracks, rollers, balances, hinges, locks, cranks, and other operating hardware
- Sash-to-frame clearances and meeting rails
- Insect screens, storm panels, sensors, labels, and manufacturer markings
- Flashing laps, drainage channels, and intentional gaps
- Weep holes and drainage slots at the bottom or sides of the assembly
- Interior finishes and belongings where windows must be opened
Paint bridging a sash to its frame can make the window difficult to operate and may tear when opened. Heavy coating can also fill a narrow drainage opening or bond flexible seals to rigid surfaces. Before final inspection, the agreed operating windows should open, close, lock, and drain as designed, without forcing freshly painted parts before the coating is ready.
Do not insert tools, wire, or high-pressure water into an unfamiliar drainage opening. If a slot appears blocked, the window professional or manufacturer's maintenance instructions should guide how it is cleared without damaging internal components.
Seal the right joints and leave drainage paths alone
Failed perimeter sealant can admit water, but “caulk every gap” is not a safe specification. Window and cladding assemblies use different combinations of face seals, back dams, laps, flashings, rainscreen cavities, and drainage routes. A gap may be a defect, an expansion joint, a flashing lap, or an intentional outlet.
The estimator should identify:
- Which perimeter joints are designed for paintable sealant
- Which old sealant is cracked, detached, incompatible, or otherwise due for renewal
- The joint width, depth, backing, movement, and substrates
- Whether primer is required by the selected sealant system
- How the new sealant will cure before coating
- Which sill, flashing, cladding, and frame gaps must remain open
- Whether a suspected envelope detail needs assessment beyond the painting scope
Our guide to exterior caulking before painting explains why joint design, compatibility, and movement matter. Sealant should follow the confirmed assembly detail rather than hide uncertainty about where water is coming from.
Traditional wood glazing needs its own decision. Loose or failed glazing compound may need repair by someone experienced with that window type before painting. The coating sequence, overlap onto glass where specified, and curing requirements should follow the glazing and paint manufacturer's current instructions.
Plan safe access and property protection
Window trim can sit above lower roofs, sloped ground, gardens, awnings, decks, balconies, or narrow side yards. The contractor should inspect each elevation before choosing access equipment or promising a production rate.
A written access and protection plan should consider:
- Building height, window locations, rooflines, dormers, balconies, and ground slope
- Stable placement for appropriate access equipment
- Lower roofs, skylights, glass canopies, railings, and surfaces that cannot carry equipment
- Overhead electrical service, lighting, cameras, and wall-mounted cables
- Hedges, trees, fences, heat pumps, awnings, and fragile landscaping
- Side-yard width and whether access would cross a property boundary
- Doors, paths, driveways, vehicles, and emergency egress
- Interior access needed to operate or protect specific windows
- Control of paint chips, wash water, dust, drips, and overspray
- Daily equipment storage, weather interruptions, and secure cleanup
Spraying may suit some repeatable trim profiles, but it requires careful masking and control around glass, siding, roofing, landscaping, vehicles, and neighbouring property. Brush application may be the better method for other conditions. The correct method is the one that meets the coating specification and protects the building, not a universal rule.
If neighbouring land is genuinely needed for access, the owner should arrange clear permission before work is scheduled. A narrow setback does not justify unstable ladder placement, walking on an unsuitable roof, or crossing a boundary without approval.
Account for Vancouver moisture and weather
Window trim is exposed to concentrated water at corners, joints, sill ends, and lower edges. One face may receive driving rain while another remains shaded and slow to dry. Interior condensation can also wet wood or collect in drainage paths even when exterior rain has stopped.
In Vancouver and the Lower Mainland, the schedule should account for:
- Recent rain and water retained in joints, end grain, glazing edges, and sill undersides
- Morning condensation on glass, metal, and shaded trim
- North-facing openings and narrow side yards with limited airflow
- Roof, gutter, balcony, or cladding runoff that repeatedly wets one window
- Direct sun heating dark trim or factory-finished frames
- Air and surface temperatures during application and curing
- Wind affecting dust, spray control, masking, and neighbouring property
- Enough suitable time for primer, sealant, finish coats, and recoating
A dry forecast icon does not prove the surface is ready. Product technical data, measured conditions when needed, actual airflow, and the prepared substrate determine when coating can proceed. Our guide to the best time to paint a Vancouver exterior provides broader seasonal context.
Ask how the opening will be left if rain interrupts the work. Exposed wood, open glazing work, removed screens, unlocked windows, access equipment, and interior protection may all need a secure temporary plan that does not trap moisture or block required drainage.
What affects exterior window trim painting cost?
There is no responsible fixed price per window without knowing the components, condition, and access. A ground-floor window with sound painted casing is different from a third-storey wood window with peeling sash edges, failed glazing, multiple colours, and difficult roof access.
Cost factors include:
- Number, size, style, and location of windows
- Casing, sill, apron, sash, frame, shutter, storm-window, and decorative details included
- Wood, metal, vinyl, fibreglass, composite, masonry, and mixed-material transitions
- Peeling, chalking, stains, corrosion, open joints, exposed substrate, and previous repair quality
- Cleaning, drying, scraping, controlled abrasion, containment, priming, and sealant scope
- Glazing, carpentry, window, or envelope repairs completed by other trades
- Hazardous-material assessment and controlled preparation where relevant
- Number of colours and contrast between existing and proposed finishes
- Masking and protection for glass, siding, roofing, interiors, landscaping, paving, and neighbours
- Building height, slope, rooflines, setbacks, and required access equipment
- Window operation, hardware protection, screens, and final functional checks
- Weather sequencing and the number of separate setup areas
For whole-home budgeting context, review the Vancouver exterior painting cost guide. Its ranges are not a substitute for a window-by-window inspection, but the guide shows why access, preparation, included surfaces, and repairs matter more than a simple opening count.
Common exterior window trim painting mistakes
Avoid:
- Calling every visible border “trim” without identifying the frame, sash, flashing, and sill
- Coating factory finishes without checking compatibility and manufacturer instructions
- Painting damp, dirty, chalky, corroded, soft, or unstable surfaces
- Covering rot, loose glazing, active leaks, or recurring interior stains
- Scraping or sanding an older hazardous coating without appropriate assessment and controls
- Filling every gap with caulk instead of confirming the assembly's drainage design
- Blocking weep holes, flashing laps, drainage slots, tracks, or operating clearances
- Painting weatherstripping, locks, hinges, cranks, screens, labels, or flexible seals
- Using excessive washing pressure around vulnerable glazing and joints
- Comparing quote totals without comparing repairs, primer, sealant, coats, access, and exclusions
- Scheduling from the forecast alone without confirming surface condition and product limits
Questions to ask before approving an estimate
Ask each contractor:
- Which casing, sill, apron, sash, frame, flashing, storm-window, shutter, and decorative surfaces are included?
- What materials and previous coating conditions did you identify?
- Which factory finishes can be coated, and what written guidance supports the system?
- Which stains, soft areas, glazing defects, or operating problems need investigation or repair first?
- Who handles carpentry, glazing, window, envelope, electrical, or hazardous-material work?
- What cleaning, coating removal, abrasion, containment, priming, and caulking are included?
- Which joints will be sealed, and which drainage or movement paths will remain open?
- How will glass, weatherstripping, hardware, tracks, weep holes, siding, roofing, interiors, and landscaping be protected?
- What access equipment and staging plan suit each elevation?
- Which products, colours, application methods, and coat counts are specified?
- How will surface dryness, temperature, humidity, wind, and recoat timing be checked?
- What happens if hidden damage or unsuitable coating conditions are found?
- What cleanup, window-operation check, final inspection, and workmanship warranty are included?
Use our house painting quote comparison checklist to compare these answers alongside insurance, payment terms, change orders, cleanup, and exclusions.
Exterior window trim painting FAQs
Can wood window trim be painted without painting the siding?
Yes, when the trim is sound and clean transition lines can be made at the siding, flashing, and window assembly. A targeted repaint can address faded or peeling casing while the siding remains serviceable. The scope should still define preparation, colours, access, masking, and protection on every elevation.
Can vinyl or aluminum window frames be painted?
Sometimes a specific frame and finish can accept a manufacturer-approved coating system, but there is no universal answer. Confirm the window material, model guidance, existing finish, colour restrictions, adhesion requirements, warranty implications, and operating clearances before including the frame. Painting the surrounding trim does not require painting the manufactured frame.
Should all gaps around a window be caulked before painting?
No. Failed joints designed for sealant may need renewal, while other gaps, flashing laps, and weep openings provide movement or drainage. Confirm the window and cladding detail before sealing. If the water-management design is uncertain or leakage is active, arrange the appropriate assessment instead of covering the gap.
Can painters fix loose glazing compound?
Glazing repair may be coordinated with painting on traditional wood windows, but it is a distinct skill and scope. Loose glass, widespread glazing failure, cracked panes, and failed insulated units need suitable window or glazing expertise. The repair and paint sequence must follow the products used and allow the required curing.
Why does paint keep peeling from the bottom of a window?
Possible causes include water sitting on a sill, exposed end grain, failed joints, condensation, damaged glazing, roof or cladding runoff, poor previous preparation, incompatible coatings, or hidden deterioration. The pattern should be inspected before selecting a repair; adding another finish coat over the same unresolved condition is unlikely to change the result.
Get an exterior window trim painting estimate in Vancouver
If your exterior window casings, sills, aprons, or other paintable trim are faded, peeling, stained, or exposing substrate, request a free, no-obligation estimate or call +1 (604) 260-1613 for 24/7 estimate requests. Share clear photos of every elevation, close-ups of coating failure and joints, the window material or model if known, and the surrounding access.
We help homeowners in Vancouver and across the Lower Mainland connect with the right painting partner for a clearly defined exterior scope. An on-site review can separate painting from window and envelope repairs, confirm the included surfaces, and produce an estimate that is easier to compare.